Getting the news that your roof needs to be replaced can stop you in your tracks. The cost, the decisions, the contractor calls, the insurance paperwork — it all lands on you at once, often after a bad storm. Here’s the truth: most of that stress comes from not knowing what to expect. When you understand each phase of the process before work even begins, you stay in control, avoid costly mistakes, and get a roof that holds up for decades. This guide walks you through every decision point, from preparation all the way to your final walk-through.
Table of Contents
- What to know before you start: Preparation and planning
- Step-by-step roof replacement process explained
- Troubleshooting and common mistakes to avoid
- How to verify quality: Inspection and post-replacement steps
- Our take: What most miss about successful roof replacements
- Ready to take the next step? Trusted roof replacement help in North Georgia
- Frequently asked questions
Key Takeaways
| Point | Details |
|---|---|
| Preparation matters most | Gather documentation, choose a licensed contractor, and understand the process before starting. |
| Step-by-step clarity | Following each phase—inspection, tear-off, installation, cleanup—reduces uncertainty. |
| Avoid common mistakes | Watch for shortcuts, unlicensed work, and skipped inspections to protect your investment. |
| Post-install checks | Inspect finished work, file insurance claims, and secure your warranty for long-term peace of mind. |
What to know before you start: Preparation and planning
Once you are aware of the stakes, the first things to handle are organization and preparation. Skipping this phase is one of the biggest reasons projects run over budget or cause avoidable headaches later.

Why roofs need replacing
Roofs don’t last forever. Most asphalt shingle roofs have a lifespan of 20 to 30 years, and here in North Georgia, that timeline can shrink fast. North Georgia homes face unique weather risks that shorten roof longevity, including heavy spring hailstorms, high winds, and summer heat that accelerates shingle degradation. Beyond age, major storm damage, widespread granule loss, persistent leaks, and rotting decking are all clear signs that a repair won’t cut it. Knowing the difference between roof repair vs. replacement early saves you time and money.
Documents to gather before you call a contractor
Before you get a single estimate, pull these items together:
- Your current homeowner’s insurance policy and declarations page
- Recent photos of damage (date-stamped if possible)
- Any previous repair invoices or inspection reports
- Your home’s original plans or permit history, if available
- Records of past insurance claims on the property
Having these ready speeds up both the insurance claim process and the contractor’s assessment.
What you’ll need at each stage
| Item | Purpose | When you need it |
|---|---|---|
| Insurance policy docs | Supports your claim filing | Before contractor visit |
| Date-stamped damage photos | Documents the cause and extent of damage | Before and during inspection |
| Licensed contractor credentials | Ensures compliant, quality installation | Before signing any contract |
| Manufacturer warranty info | Covers materials defects post-install | At contract stage |
| Building permits | Required for legal replacement in most GA counties | Before tear-off begins |
Choosing the right contractor
This step matters more than most homeowners realize. Choosing a roofing contractor in North Georgia means verifying their license with the state, confirming they carry liability and workers’ compensation insurance, and checking their local reputation. Ask specifically about their experience with insurance restoration work, because that process has its own requirements.
Pro Tip: Always request a written, itemized estimate that lists labor, materials, disposal fees, and permit costs separately. Vague estimates are a red flag. Compare at least two or three bids before you commit, and never pay more than a small deposit upfront.
Step-by-step roof replacement process explained
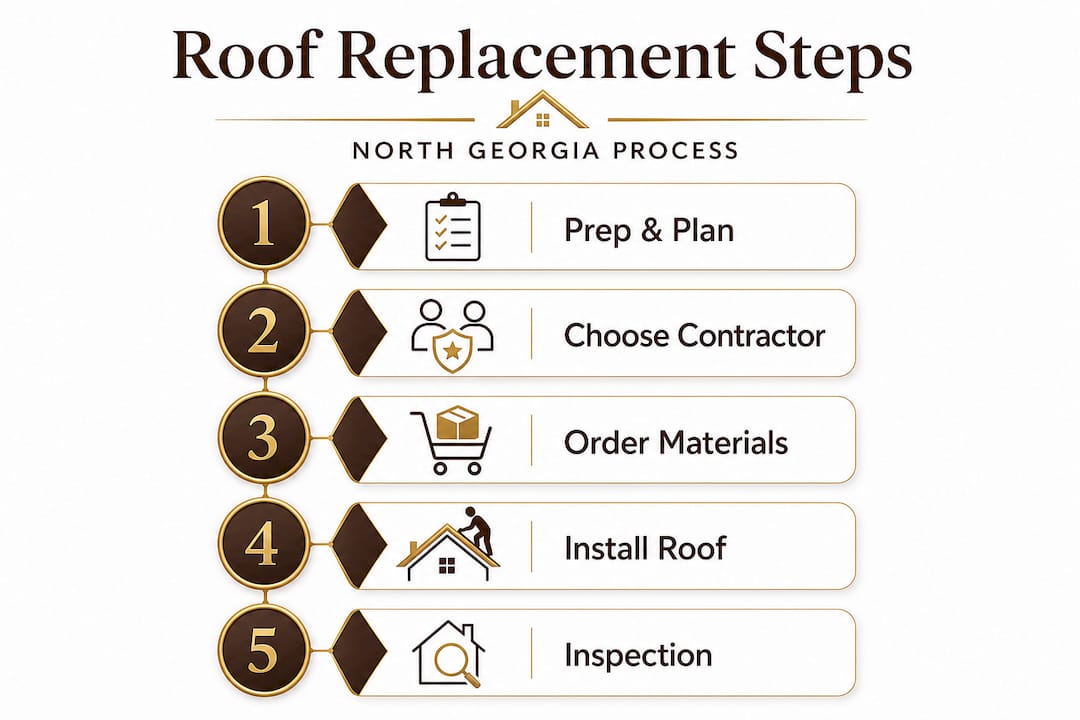
With your preparation complete, you’re ready to follow the full replacement process step by step. A typical roof replacement involves several clear phases, each with distinct tasks and homeowner decisions.
The main phases of roof replacement
-
Initial inspection and damage assessment. A licensed contractor walks your entire roof and attic to document damage, measure the square footage, and identify any structural issues with the decking or rafters. This is where the scope of work gets defined.
-
Material selection and contract signing. You choose your shingle type, color, underlayment, and other components. The contractor finalizes pricing, timelines, and warranty details. Permits are pulled at this stage.
-
Roof tear-off. The crew removes the old shingles, flashing, and underlayment down to the decking. Any rotted or compromised decking boards are replaced at this point. This phase typically takes half a day to a full day depending on roof size.
-
Underlayment installation. A moisture barrier (felt or synthetic underlayment) is rolled out and stapled across the full deck before shingles go down. This layer is critical for waterproofing and is required by most manufacturer warranties.
-
Shingle and flashing installation. Shingles are installed from the bottom edge up. Flashing is applied at all vulnerable points: chimneys, valleys, skylights, and wall intersections. Ridge caps finish the peak of the roof.
-
Cleanup and debris removal. A quality crew uses tarps and magnetic nail sweepers to protect your yard and landscaping. All old material is hauled away the same day.
-
Final inspection. The contractor does a full walk-around with you to confirm everything is complete and meets installation standards. Photos are taken for your records.
⚠️ Safety note: During tear-off and installation, keep children and pets indoors. Roofing nails and shingle debris can scatter across the yard. Ask your contractor specifically about their debris management plan before work begins. Protect delicate landscaping and vehicles parked near the home.
Comparing your main options
| Factor | Asphalt shingles | Metal roofing | Professional install | DIY install |
|---|---|---|---|---|
| Average cost | Lower upfront | Higher upfront | Warranty-eligible | Voids most warranties |
| Lifespan | 20 to 30 years | 40 to 70 years | Code-compliant | Risk of code violations |
| Best for | Most residential homes | Long-term investment | Insurance claim approval | Not recommended |
| Install time | 1 to 2 days | 2 to 4 days | Predictable timeline | Variable and risky |
For most North Georgia homeowners, asphalt architectural shingles offer the best combination of cost, performance, and insurance compatibility. Understanding the full roof replacement phases helps you ask better questions at every stage and catch anything that seems out of order.
Troubleshooting and common mistakes to avoid
Even with the best plan, mistakes can happen during roof replacement projects. Knowing what to watch for keeps you protected.
Most common mistakes homeowners make
- Accepting a verbal estimate instead of a written, itemized contract
- Not verifying that permits were actually pulled before tear-off begins
- Ignoring attic ventilation, which causes heat and moisture buildup that shortens shingle life significantly
- Choosing a contractor based on price alone without checking credentials
- Failing to document the existing damage before the crew starts work
- Skipping the final walk-through inspection with the contractor
Each of these mistakes can cost you thousands of dollars, either through poor workmanship, failed warranty claims, or insurance disputes. Skipping inspection steps or using unlicensed contractors is one of the most common causes of long-term roof issues that surface within just a few years of installation.
⚠️ Legal note: In Georgia, roofing work above a certain dollar threshold requires a licensed contractor. Hiring unlicensed labor puts you at risk of having your insurance claim denied, voiding your material warranty, and being held liable for injuries on your property. Always confirm license and insurance status before any work begins.
What to watch for during installation
If you’re home during the project, here’s what a quality installation looks like in practice. The crew should arrive with clearly marked materials that match your contract specs. Shingles should be stored flat, not stood on end. You should see underlayment going down before any shingles are installed. Flashing should be metal, not just caulk or roofing cement.
For homes with storm-damaged roof repair needs, it’s especially important to confirm the full scope of deck damage is addressed during tear-off, not just patched over. Rotted decking that gets covered with new shingles is a hidden time bomb.
Pro Tip: Walk the perimeter of your home with the crew foreman before they leave on the final day. Use a checklist: check flashing at every transition point, look for exposed nail heads, confirm the ridge cap is fully secured, and check that all vents are intact and properly sealed. Take photos of everything. This documentation matters for warranty and insurance purposes. For a more complete picture of what quality looks like after the job is done, review roof restoration basics to understand what a properly finished roof should include.
How to verify quality: Inspection and post-replacement steps
After the work is finished, your final responsibility is making sure everything was done right. Proper inspection ensures all installation meets manufacturer guidelines, which directly affects both your warranty and your insurance claim standing.
Your post-replacement checklist
- Walk the roof perimeter at ground level. Look for any areas where shingles appear uneven, lifted, or misaligned. Uniform, straight rows indicate proper installation.
- Check all flashing points. Chimney, valleys, pipe boots, and skylights should all have clean, tight metal flashing with no visible gaps.
- Inspect the gutters. Clean gutters confirm the crew used magnetic sweepers and tarps. Excessive granule runoff in new gutters can indicate an issue with shingle quality.
- Go into the attic. Look for any daylight visible through the decking, signs of moisture, or improper nail penetration.
- Review all permit paperwork. Confirm the permit was closed out correctly with your local county building department.
- Get all warranty documents in writing. Both the manufacturer’s material warranty and the contractor’s workmanship warranty should be signed and dated.
Signs your new roof was installed correctly
- Shingles are uniform in alignment with no raised edges or rippling
- All valleys are clean and free of exposed underlayment
- No exposed nail heads visible on field shingles
- Ridge cap is fully adhered and runs straight across the peak
- Drip edge is installed along all eaves and rakes
Filing or updating your insurance claim
If your replacement was related to storm damage, contact your insurance adjuster as soon as the work is complete. Submit your contractor’s final invoice, permit documentation, and before-and-after photos. Many roof repair insurance claims have a supplemental process where the final payment is released after the work is verified. Don’t wait to submit this paperwork. Delays can reduce your final payout or complicate the claim.
Our take: What most miss about successful roof replacements
Now that you know the process, here’s what most homeowners overlook in pursuit of getting a perfect new roof.
Everyone focuses on materials. Asphalt vs. metal, color selection, shingle brand. Those choices matter, but they are rarely what separates a smooth project from a stressful one. What actually makes the difference is thorough prep and open communication with your contractor from day one.
We’ve seen it play out this way many times. Two homeowners, same neighborhood, same storm damage, same shingle product. One called us, got a full written estimate, pulled permits, walked the job with our foreman, and had their insurance claim wrapped up in two weeks. Their roof looked great and their warranty was fully documented. The other homeowner went with a cheaper bid, skipped the permit, and never did a final inspection. Eight months later they had a leak at the chimney flashing, and both the contractor’s warranty and their insurance claim were disputed because there was no documentation.
The difference wasn’t the material. It was the process.
The roof replacement advantages people talk about, like improved energy efficiency, curb appeal, and long-term protection, only show up fully when the installation is done right and documented properly. A beautiful roof that wasn’t inspected or permitted is a liability, not an asset.
Pro Tip: Keep a replacement journal. It sounds simple, but write down dates, take photos on each day of the project, note every conversation with your contractor, and file every document. If you ever need to make a warranty claim or reopen an insurance case, that journal is gold.
Ready to take the next step? Trusted roof replacement help in North Georgia
If you want expert help tailored to North Georgia’s roofing challenges, here’s how to get started.
At Infinity Roofing GA, we’ve been serving homeowners across North Georgia since 2018. We know this region’s weather patterns, local permitting requirements, and insurance restoration process inside and out. Whether you’re navigating storm damage for the first time or planning a long-overdue replacement, our team is here to make the process straightforward and stress-free.

Our roof replacement services include full inspections, insurance claim assistance, premium material options, and a workmanship warranty you can count on. Not sure if you need a full replacement? Check out our repair vs. replacement advice to help you decide. And when you’re ready to hire, we make it easy to confirm we are fully licensed roofing contractors who stand behind our work. Reach out today for a same-day estimate and a conversation with a real, local expert.
Frequently asked questions
How long does a typical roof replacement take in North Georgia?
Most North Georgia roof replacements are completed in one to three days, depending on the size of the roof and current weather conditions. Larger or more complex roofs with steep pitches or multiple valleys may take slightly longer.
Do I need to leave my home during roof replacement?
You can usually stay home during the project, but expect significant noise and vibration throughout the day. Homeowners with young children, elderly family members, or pets sensitive to noise may prefer to plan outings on installation days.
What should I look for after roof installation to ensure it was done correctly?
Check for uniform shingle alignment, properly installed metal flashing at all transitions, sealed pipe boots and vents, and confirm that all debris and nails have been fully removed from your yard and gutters.
Will my homeowner’s insurance cover roof replacement after storm damage?
Most comprehensive home insurance policies do cover storm-related roof replacement, but you must file a claim promptly after the damage occurs. Delays in reporting can result in reduced payouts or denial. Documenting damage with photos immediately after the storm strengthens your case.
How do I choose between roof repair and full replacement?
If more than 30% of your roof is damaged or the roof is approaching the end of its expected lifespan, replacement is often more cost-effective than repeated repairs. A licensed contractor’s inspection will give you a clear answer based on your actual roof condition.